
- 单机上使用git
- 简历远程仓库
- 克隆远程仓库
单机使用git
基本操作
-
安装git使用
yum install -y git即可; -
首先为git创建一个存放仓库的目录,然后使用
git init进行仓库的初始化操作:$ mkdir -p /data/gitroot $ cd /data/gitroot $ git init 初始化空的 Git 版本库于 /data/gitroot/.git/ # 初始化后会在目录下创建一个.git目录 $ ls -la 总用量 0 drwxr-xr-x. 3 root root 18 9月 9 22:15 . drwxr-xr-x. 6 root root 64 9月 9 22:12 .. drwxr-xr-x. 7 root root 119 9月 9 22:15 .git -
我们在gitroot中创建一些文件,然后使用
git add [filename]将文件加入版本库控制,再使用git commit -m [description]将文件提交到版本库:$ echo -e "123\naaa\n456\nbbb" > 1.txt $ git add 1.txt # 初次提交会有一些配置提示信息,提示的配置按提示执行命令修改后,以后也可以到用户家目录下的.gitconfig文件中修改 $ git commit -m 'add new file 1.txt' [master(根提交) 13a572e] add new file 1.txt Committer: root <root@localhost.localdomain> 您的姓名和邮件地址基于登录名和主机名进行了自动设置。请检查它们正确与否。您可以通过下面的命令对其进行明确地设置以免再出现本提示信息: git config --global user.name "Your Name" git config --global user.email you@example.com 设置完毕后,您可以用下面的命令来修正本次提交所使用的用户身份: git commit --amend --reset-author 1 file changed, 4 insertions(+) create mode 100644 1.txt -
git status可以查看当前仓库的状态:$ git status # 位于分支 master 无文件要提交,干净的工作区 # 如果更改了文件内容但是没有执行add和commit,则提示如下 # vi 1.txt [root@localhost gitroot]# git status # 位于分支 master # 尚未暂存以备提交的变更: # (使用 "git add <file>..." 更新要提交的内容) # (使用 "git checkout -- <file>..." 丢弃工作区的改动) # # 修改: 1.txt # 修改尚未加入提交(使用 "git add" 和/或 "git commit -a") -
git diff [filename]可以将文件与仓库中的版本进行对比,提示本次修改了什么内容:$ git diff 1.txt diff --git a/1.txt b/1.txt index b149eee..e933892 100644 --- a/1.txt +++ b/1.txt @@ -2,3 +2,4 @@ aaa 456 bbb +sabi
版本回退
-
如果我们对文件的修改后但是由于一些原因,想回退到之前的版本,那么就要使用到git的版本回退功能;
-
git log可以查看当前仓库所以的提交记录:$ git log commit 4db5b34ad40825ad5dcd0c826cb449983cf0a012 Author: root <root@localhost.localdomain> Date: Sun Sep 9 22:26:58 2018 +0800 change 1.txt commit 13a572e092ee57f56b52ab7a5d4865baf4336125 Author: root <root@localhost.localdomain> Date: Sun Sep 9 22:19:31 2018 +0800 add new file 1.txt- 这里可以看到当前仓库一共有两次提交;
- 加上选项
--pretty=oneline可以以简单模式输出信息:
$ git log --pretty=oneline 8e0da3ff80b115d57bbd06c6fa710583ed5fa9b1 change 1.txt 13a572e092ee57f56b52ab7a5d4865baf4336125 add new file 1.txt- 这里描述信息前的一长串字符是版本的ID,后面是版本对应的提交的操作;
-
版本回退使用
git reset --hard [ID],其中ID可以使用简写,只需要复制ID的前几个字符即可,比如这里要回到第一个版本:$ git reset --hard 13a572e092 HEAD 现在位于 13a572e add new file 1.txt # 再次查看git log,只能看到一条记录 $ git log --pretty=oneline 13a572e092ee57f56b52ab7a5d4865baf4336125 add new file 1.txt -
版本回退之后,使用
git log就只能看到回退到的版本之前的记录,如果想再回到回退前的版本,就需要有对应版本的ID,所以可以使用git reflog查看所有的历史版本:$ git reflog 13a572e HEAD@{0}: reset: moving to 13a572e092 8e0da3f HEAD@{1}: commit (amend): change 1.txt 4db5b34 HEAD@{2}: commit: change 1.txt 13a572e HEAD@{3}: commit (initial): add new file 1.txt- 这时候就可以使用显示的ID进行回退:
$ git reset --hard 8e0da3f HEAD 现在位于 8e0da3f change 1.txt $ git log --pretty=oneline 8e0da3ff80b115d57bbd06c6fa710583ed5fa9b1 change 1.txt 13a572e092ee57f56b52ab7a5d4865baf4336125 add new file 1.txt -
如果我们在目录内误删除了文件,但版本库里还有,则可以使用
git checkout -- [filename]找回:$ ls 1.txt $ rm 1.txt rm:是否删除普通文件 "1.txt"?y $ git status # 位于分支 master # 尚未暂存以备提交的变更: # (使用 "git add/rm <file>..." 更新要提交的内容) # (使用 "git checkout -- <file>..." 丢弃工作区的改动) # # 删除: 1.txt # 修改尚未加入提交(使用 "git add" 和/或 "git commit -a") $ ls $ git checkout -- 1.txt $ ls 1.txt $ git status # 位于分支 master 无文件要提交,干净的工作区 -
如果修改了一个文件,并且执行了add操作,但没有进行commit,这时候将文件回退到修改前的状态,则需要使用
git reset HEAD [filename]:[root@localhost gitroot]# vi 1.txt [root@localhost gitroot]# git add . [root@localhost gitroot]# git status # 位于分支 master # 要提交的变更: # (使用 "git reset HEAD <file>..." 撤出暂存区) # # 修改: 1.txt # [root@localhost gitroot]# git reset HEAD 1.txt 重置后撤出暂存区的变更: M 1.txt -
如果本地删除了一个文件,并且想要将版本库内对应的文件也删除,就需要执行
git rm [filename],然后commit即可:[root@localhost gitroot]# rm 1.txt rm:是否删除普通文件 "1.txt"?y [root@localhost gitroot]# git rm 1.txt rm '1.txt' [root@localhost gitroot]# git commit -m 'rm 1.txt' [master 7d13f75] rm 1.txt 1 file changed, 5 deletions(-) delete mode 100644 1.txt [root@localhost gitroot]# git status # 位于分支 master 无文件要提交,干净的工作区
远程仓库
建立远程仓库
-
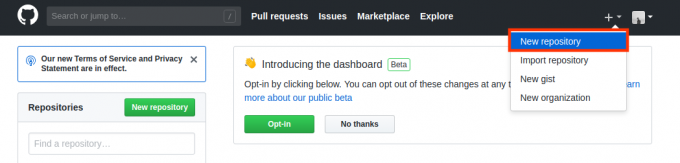
建立远程仓库可以选择github,然后注册账号并登录;
-
如图所示,进行新建仓库操作:
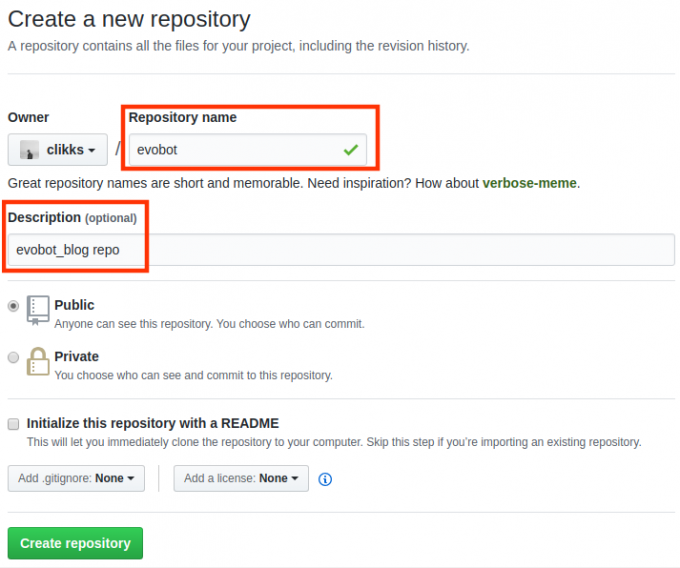
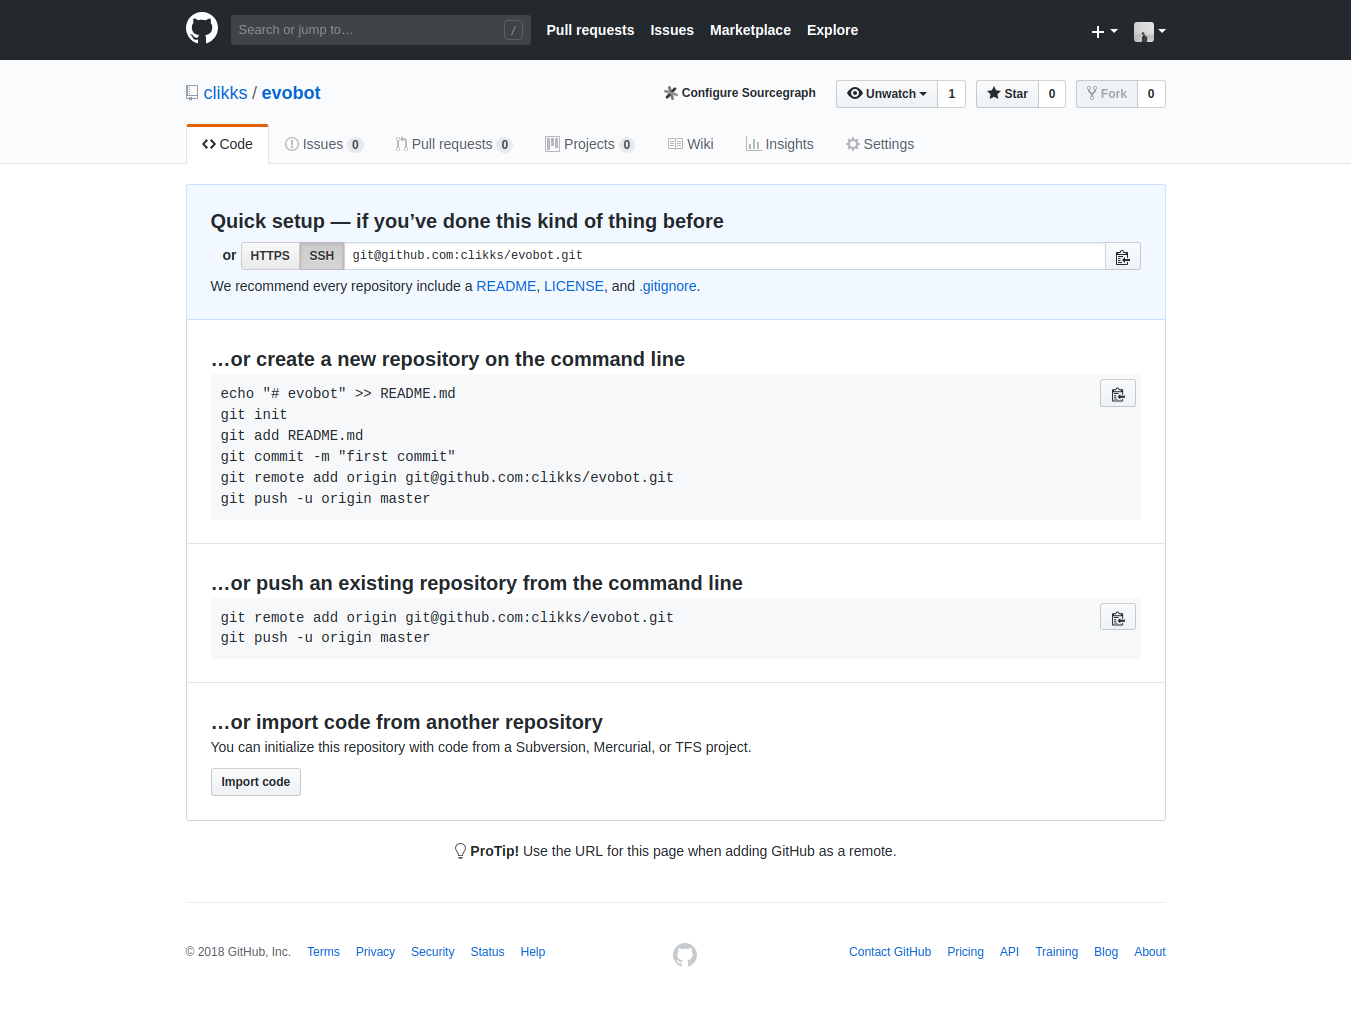
- 最后点击Create repository,会进入仓库页面:
-
然后为账号添加秘钥,用来远程提交仓库时进行认证,点击右上角账号头像,选择
Settings,然后在页面左侧菜单点击SSH and GPG keys,再点击右边的New SSH key,然后在页面中写入自定义的Title,再将我们本地Linux中的公钥复制到Key栏中,最后点击Add SSH key完成添加: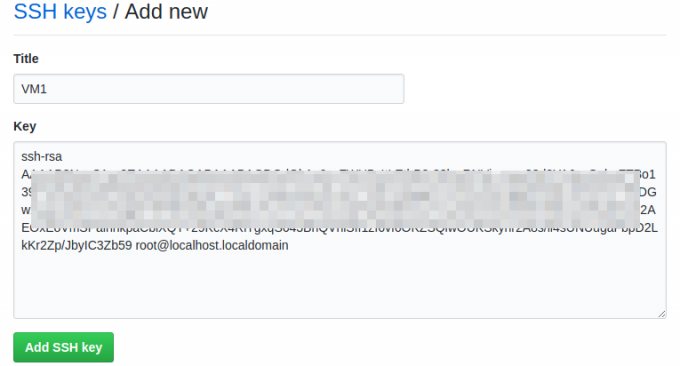
本地仓库关联远程仓库
-
我们可以将之前在本地创建的仓库,与刚才github上创建的远程仓库关联起来,并且将本地仓库的内容提交到远程仓库去;
-
首先进入本地仓库,我们重新创建一个文件
README.md,写入一些内容,然后使用git add和git commit提交到版本库;[root@localhost gitroot]# echo '# EVOBOT repository' > README.md [root@localhost gitroot]# git add . [root@localhost gitroot]# git commit -m 'add README.md' [master bf4c28c] add README.md 1 file changed, 1 insertion(+) create mode 100644 README.md -
然后使用
git remote add origin git@github.com:[repo]命令将本地仓库与远程仓库关联:[root@localhost gitroot]# git remote add origin git@github.com:clikks/evobot.git -
然后使用
git push -u origin master将本地仓库的内容提交到远程仓库的master分支:[root@localhost gitroot]# git push -u origin master The authenticity of host 'github.com (52.74.223.119)' can't be established. RSA key fingerprint is 16:27:ac:a5:76:28:2d:36:63:1b:56:4d:eb:df:a6:48. Are you sure you want to continue connecting (yes/no)? yes Warning: Permanently added 'github.com,52.74.223.119' (RSA) to the list of known hosts. Counting objects: 11, done. Compressing objects: 100% (4/4), done. Writing objects: 100% (11/11), 826 bytes | 0 bytes/s, done. Total 11 (delta 0), reused 0 (delta 0) To git@github.com:clikks/evobot.git * [new branch] master -> master 分支 master 设置为跟踪来自 origin 的远程分支 master。 -
关联了远程仓库后,在github上仓库的页面内,显示如下:
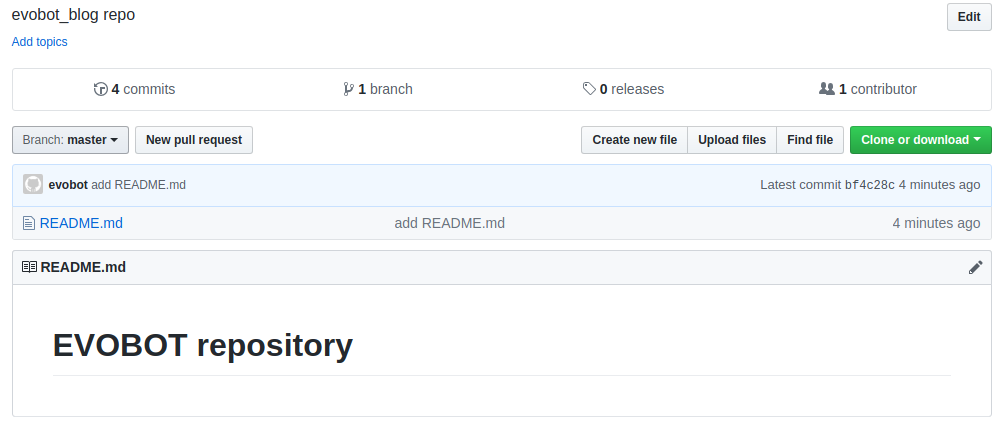
-
再次在本地仓库中创建文件并提交到本地仓库,这时候要将本地仓库的更改提交到远程仓库,只需要在
git commit执行之后,执行git push命令即可:[root@localhost gitroot]# echo 'this is 2.txt' > 2.txt [root@localhost gitroot]# git add 2.txt [root@localhost gitroot]# git commit -m 'add 2.txt' [master 3a9ad27] add 2.txt 1 file changed, 1 insertion(+) create mode 100644 2.txt [root@localhost gitroot]# git push warning: push.default 未设置,它的默认值将会在 Git 2.0 由 'matching' 修改为 'simple'。若要不再显示本信息并在其默认值改变后维持当前使用习惯, 进行如下设置: git config --global push.default matching 若要不再显示本信息并从现在开始采用新的使用习惯,设置: git config --global push.default simple 参见 'git help config' 并查找 'push.default' 以获取更多信息。 ('simple' 模式由 Git 1.7.11 版本引入。如果您有时要使用老版本的 Git, 为保持兼容,请用 'current' 代替 'simple' 模式) Warning: Permanently added the RSA host key for IP address '13.229.188.59' to the list of known hosts. Counting objects: 4, done. Compressing objects: 100% (2/2), done. Writing objects: 100% (3/3), 274 bytes | 0 bytes/s, done. Total 3 (delta 0), reused 0 (delta 0) To git@github.com:clikks/evobot.git bf4c28c..3a9ad27 master -> master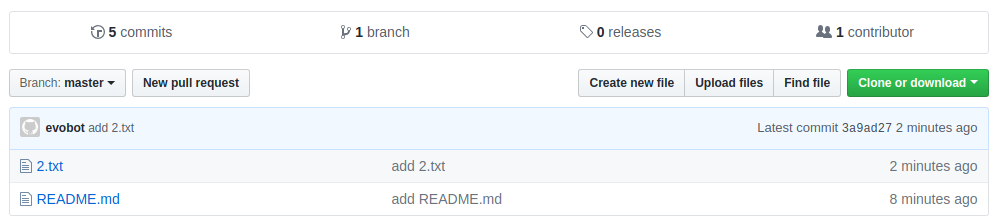
克隆远程仓库
-
克隆仓库可以将远程仓库创建到本地,但如果仓库不是自己账号所属,那么本地仓库的改动是无法提交到远程仓库的,克隆仓库使用
git clone git@github:[repo]命令; -
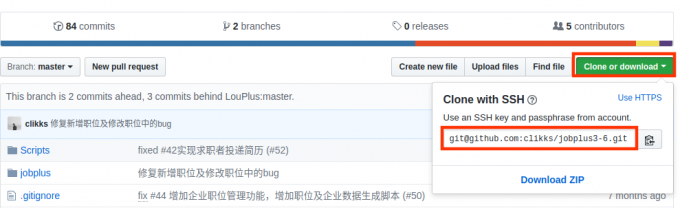
在github上的仓库页面,可以找到仓库地址:
[root@localhost ~]# git clone git@github.com:clikks/jobplus3-6.git 正克隆到 'jobplus3-6'... remote: Counting objects: 592, done. remote: Total 592 (delta 0), reused 0 (delta 0), pack-reused 591 接收对象中: 100% (592/592), 442.30 KiB | 215.00 KiB/s, done. 处理 delta 中: 100% (328/328), done.- 克隆完毕后,在当前目录会创建一个与仓库同名的目录,目录内的内容与远程仓库相同:
[root@localhost ~]# ls jobplus3-6 [root@localhost ~]# ls jobplus3-6/ jobplus manage.py README.md requirements.txt Scripts -
如果克隆的仓库我们有更改的权限,那么对仓库的操作与之前本地仓库相同,更改完成后,使用
git push提交到远程仓库即可; -
如果远程仓库被其他人进行了更改,在本地仓库可以执行
git pull将远程的更新拉取到本地。