Linux计划任务与服务管理
Linux计划任务
-
Linux中需要定时执行一个程序或者脚本,使用crontab工具,可以查看**/etc/crontab**配置文件的内容:
SHELL=/bin/bash PATH=/sbin:/bin:/usr/sbin:/usr/bin MAILTO=root # For details see man 4 crontabs # Example of job definition: # .---------------- minute (0 - 59) # | .------------- hour (0 - 23) # | | .---------- day of month (1 - 31) # | | | .------- month (1 - 12) OR jan,feb,mar,apr ... # | | | | .---- day of week (0 - 6) (Sunday=0 or 7) OR sun,mon,tue,wed,thu,fri,sat # | | | | | # * * * * * user-name command to be executed -
这里定义了三个变量,分别是
SHELL环境、PATH环境变量、MAILTO发送邮件到某个用户,配置文件下半部分则是crontab的格式,5个*分别表示:分、时、日、月、每周哪一天,然后则是执行命令的用户,默认是配置定时任务的用户,最后则是要执行的命令; -
定义crontab定时任务,使用
crontab -e命令,然后的操作与vim相同,例如凌晨3点执行一个任务,则写入下面的内容:0 3 * * * /bin/bash /use/local/sbin/xx.sh >> /tmp/123.log 2>> /tmp/123.log- crontab的时间设置,除了指定一个时刻,还可以指定时间段或者多个时间,如每两个月1-10号周二和周五执行:
0 3 1-10 */2 2,5 command。 - 如果需要定义一个只需要今年执行的命令,则使用星期来确定,因为年份中指定日期的星期与其他年份是不想同的。
- crontab的时间设置,除了指定一个时刻,还可以指定时间段或者多个时间,如每两个月1-10号周二和周五执行:
-
启动crontab服务使用命令
systemctl start crond,然后可以使用systemctl status crond查看服务状态:[root@evobot ~]# systemctl start crond [root@evobot ~]# ps -aux | grep cron root 605 0.0 0.0 126260 1644 ? Ss 4月19 0:12 /usr/sbin/crond -n root 19401 0.0 0.0 112676 984 pts/0 R+ 00:44 0:00 grep --color=auto cron [root@evobot ~]# systemctl status crond ● crond.service - Command Scheduler Loaded: loaded (/usr/lib/systemd/system/crond.service; enabled; vendor preset: enabled) Active: active (running) since 四 2018-04-19 00:35:50 CST; 3 weeks 2 days ago Main PID: 605 (crond) CGroup: /system.slice/crond.service └─605 /usr/sbin/crond -n 4月 19 00:35:50 evobot systemd[1]: Started Command Scheduler. 4月 19 00:35:50 evobot systemd[1]: Starting Command Scheduler... 4月 19 00:35:50 evobot crond[605]: (CRON) INFO (RANDOM_DELAY will be scale....) 4月 19 00:35:50 evobot crond[605]: (CRON) INFO (running with inotify support) 5月 12 00:44:01 evobot crond[605]: (root) RELOAD (/var/spool/cron/root) Hint: Some lines were ellipsized, use -l to show in full. -
如果遇到定时任务不执行的问题,首先查看命令路径是否在crontab配置文件的PATH变量,或者使用命令的绝对路径执行;
-
crontab -l可以列出当前用户的计划任务,而每个用户的计划任务文件则是在**/var/spool/cron/[username]**文件内:[root@evobot ~]# cat /var/spool/cron/root */1 * * * * /usr/local/qcloud/stargate/admin/start.sh > /dev/null 2>&1 & 0 3 1-10 */2 */2 ls- 所以要备份用户的crontab任务,直接将上面的文件拷贝即可。
-
crontab -r是删除当前用户配置的计划任务,crontab -u root -l则是查看指定用户的计划任务列表。
服务管理
chkconfig
查看管理服务列表
-
chkconfig能够管理服务的启动、开机自启动和指定级别启动,chkconfig是Centos6的服务管理工具,在Centos7中则使用的是systemd;
-
chkconfig --list可以查看当前使用chkconfig管理的服务:[root@evobot ~]# chkconfig --list netconsole 0:关 1:关 2:关 3:关 4:关 5:关 6:关 network 0:关 1:关 2:开 3:开 4:开 5:开 6:关 -
chkconfig管理的服务的启动脚本在**/etc/init.d/**目录下:
[root@evobot ~]# ls /etc/init.d/ functions netconsole network README -
在
chkconfig --list命令的输出中,可以看到network服务在2、3、4、5级别的状态都是开,即表示在这几个运行级别服务会自启动,如果想要将各级别的服务自启动关闭,则使用命令chkconfig network off:[root@www ~]# chkconfig network off [root@www ~]# chkconfig --list netconsole 0:关 1:关 2:关 3:关 4:关 5:关 6:关 network 0:关 1:关 2:关 3:关 4:关 5:关 6:关 -
重新打开服务状态则使用
chkconfig network on:[root@www ~]# chkconfig network on [root@www ~]# chkconfig --list netconsole 0:关 1:关 2:关 3:关 4:关 5:关 6:关 network 0:关 1:关 2:开 3:开 4:开 5:开 6:关
系统运行级别
- 这里的6个级别表示开机系统进入的状态,具体的含义如下表:
| 级别 | 作用 |
|---|---|
| 0 | 关机 |
| 1 | 单用户 |
| 2 | 无NFS服务,无GUI的正常多用户状态 |
| 3 | 无GUI的正常多用户状态 |
| 4 | 保留级别,未使用 |
| 5 | 图形界面多用户状态 |
| 6 | 重启 |
- 在Centos6中可以修改**/etc/inittab**文件改变系统的运行级别;
更改指定级别服务状态
-
使用命令
chkconfig --level 24 network off可以关闭指定级别服务自启:[root@www ~]# chkconfig --level 24 network off [root@www ~]# chkconfig --list netconsole 0:关 1:关 2:关 3:关 4:关 5:关 6:关 network 0:关 1:关 2:关 3:开 4:关 5:开 6:关 -
使用
chkconfig --level 24 network on可以重新打开指定级别服务自启,不能打开服务在0,1,6级别的自启开关,否则会导致服务启动异常。
增加删除服务
-
如果要给chkconfig增加新的服务进行管理,需要先将服务的启动脚本放到**/etc/init.d/**目录下:
[root@www init.d]# ls functions myservice netconsole network README -
启动脚本的格式如下,首先启动脚本是shell脚本,然后
#chkconfig: 2345 10 90指定服务运行级别和启动关闭顺序,这里分别是第10位启动和第90位关闭,然后描述description也必须存在:#! /bin/bash # # network Bring up/down networking # # chkconfig: 2345 10 90 # description: Activates/Deactivates all network interfaces configured to \ # start at boot time. # ### BEGIN INIT INFO # Provides: $network # Should-Start: iptables ip6tables NetworkManager-wait-online NetworkManager $network-pre # Short-Description: Bring up/down networking # Description: Bring up/down networking ### END INIT INFO # Source function library. . /etc/init.d/functions if [ ! -f /etc/sysconfig/network ]; then exit 6 fi . /etc/sysconfig/network if [ -f /etc/sysconfig/pcmcia ]; then . /etc/sysconfig/pcmcia fi -
然后使用命令
chkconfig --add myservice将服务添加到chkconfig:[root@www init.d]# chkconfig --add myservice [root@www init.d]# chkconfig --list myservice 0:关 1:关 2:开 3:开 4:开 5:开 6:关 netconsole 0:关 1:关 2:关 3:关 4:关 5:关 6:关 network 0:关 1:关 2:关 3:开 4:关 5:开 6:关 -
要删除服务使用
chkconfig --del myservice即可:[root@www init.d]# chkconfig --del myservice [root@www init.d]# chkconfig --list netconsole 0:关 1:关 2:关 3:关 4:关 5:关 6:关 network 0:关 1:关 2:关 3:开 4:关 5:开 6:关
systemd
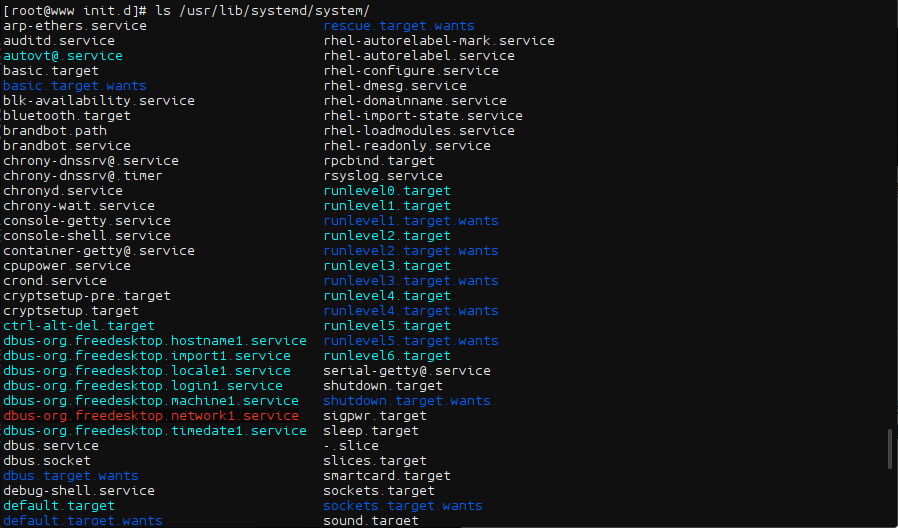
- systemd是Centos7默认的服务管理工具,查看systemd的所有unit使用命令
systemctl list-unit-files,命令的输出结果不仅包括service,还有target、socket等等;
服务管理相关命令
-
查看systemd管理的所有服务,命令为
systemctl list-units --all --type=service,输出内容只包含service,并且会显示服务状态、描述信息等,如果命令中不加--all,则只显示active和failed状态的服务,不显示inactive状态的服务: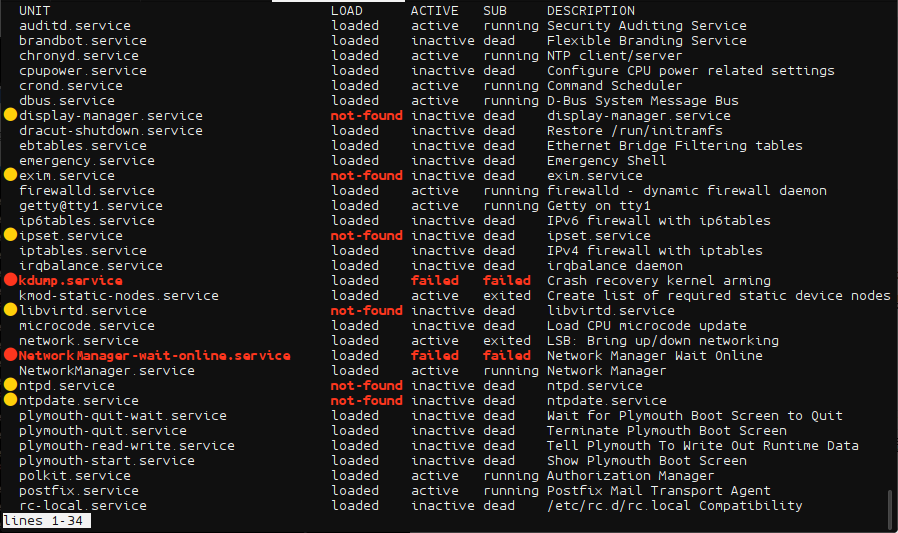
-
让服务开机自启动,使用命令
systemctl enable crond.service,服务名后面的.service可以不写:[root@www init.d]# systemctl enable crond.service Created symlink from /etc/systemd/system/multi-user.target.wants/crond.service to /usr/lib/systemd/system/crond.service.- 这里的输出也可以看到服务的启动脚本路径,实际上启动脚本是一个软连接文件,可以查看到启动脚本的具体内容,设置服务开机自启动实际上就是创建了启动脚本的软连接到**/etc/systemd/system/multi-user.target.wants/**目录下:
[root@www init.d]# ls -l /etc/systemd/system/multi-user.target.wants/crond.service lrwxrwxrwx 1 root root 37 5月 11 01:40 /etc/systemd/system/multi-user.target.wants/crond.service -> /usr/lib/systemd/system/crond.service [root@www init.d]# cat !$ cat /etc/systemd/system/multi-user.target.wants/crond.service [Unit] Description=Command Scheduler After=auditd.service systemd-user-sessions.service time-sync.target [Service] EnvironmentFile=/etc/sysconfig/crond ExecStart=/usr/sbin/crond -n $CRONDARGS ExecReload=/bin/kill -HUP $MAINPID KillMode=process [Install] WantedBy=multi-user.target -
关闭服务开机自启则使用
systemctl disable crond.service命令:[root@www init.d]# systemctl disable crond.service Removed symlink /etc/systemd/system/multi-user.target.wants/crond.service.- 关闭服务的自启动则会将启动脚本的软连接文件删除。
-
查看服务状态使用
systemctl status crond.service: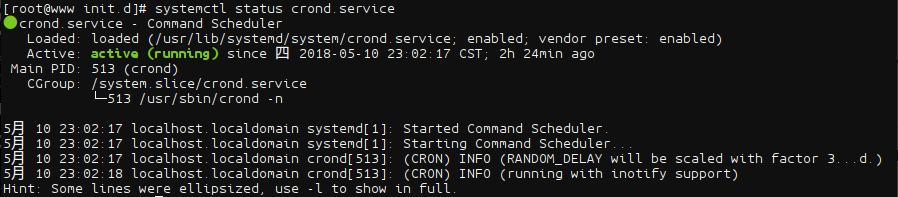
-
systemctl [start|stop|restart] crond.service则分别表示启动服务、停止服务和重启服务: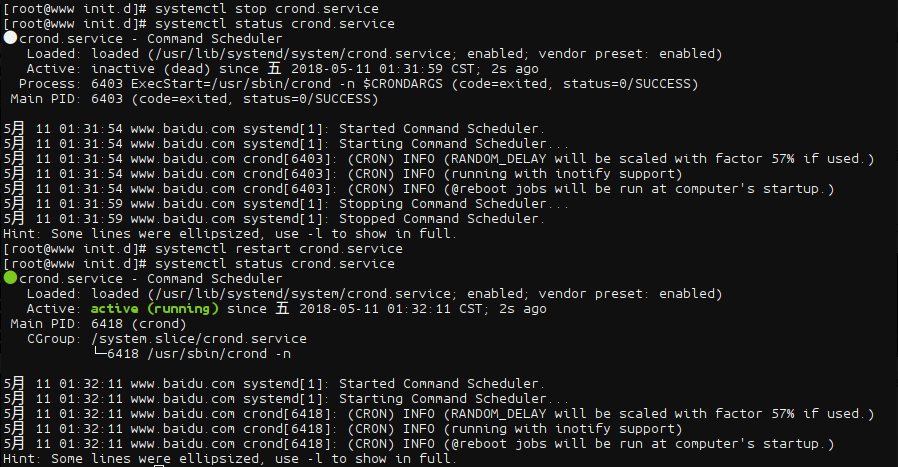
-
命令
systemdctl is-enabled crond可以查看服务是否是开机启动:[root@www init.d]# systemctl is-enabled crond.service enabled
unit介绍
-
设置服务自启动时从**/usr/lib/systemd/system/目录创建了启动脚本的软连接,而这个目录下除了service之外还有其他文件,这些文件都被称为unit**:
-
unit分为以下几种类型:
service:系统服务
target:多个unit组成的组,Centos6的7个运行级别对应的target如下:

device:硬件设备
mount:文件系统挂载点
automount:自动挂载点
path:文件或路径
scope:不是由systemd启动的外部进程
slice:进程组
snapshot:systemd快照
socket:进程间通信套接字
swap:swap文件
timer:定时器
unit相关命令
-
systemctl list-units列出正在运行的unit:
-
systemctl list-units --all列出所有,包括失败或inactive的unit: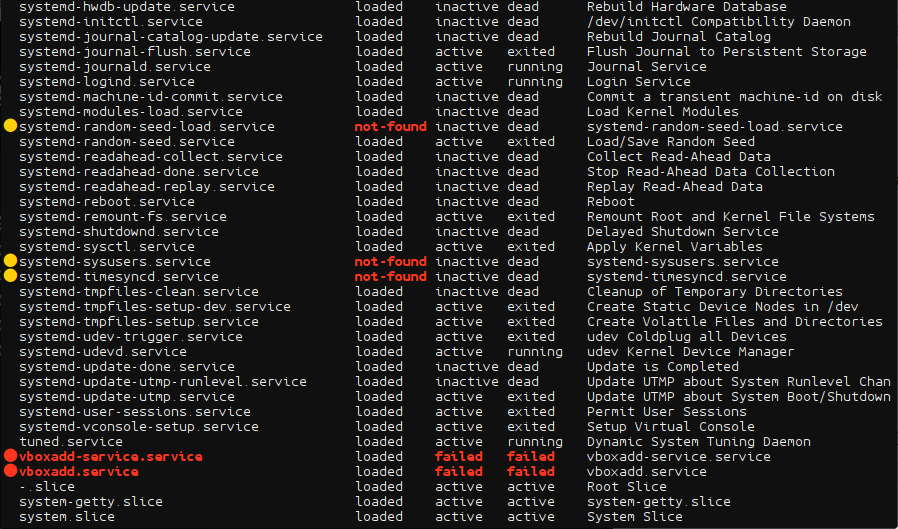
-
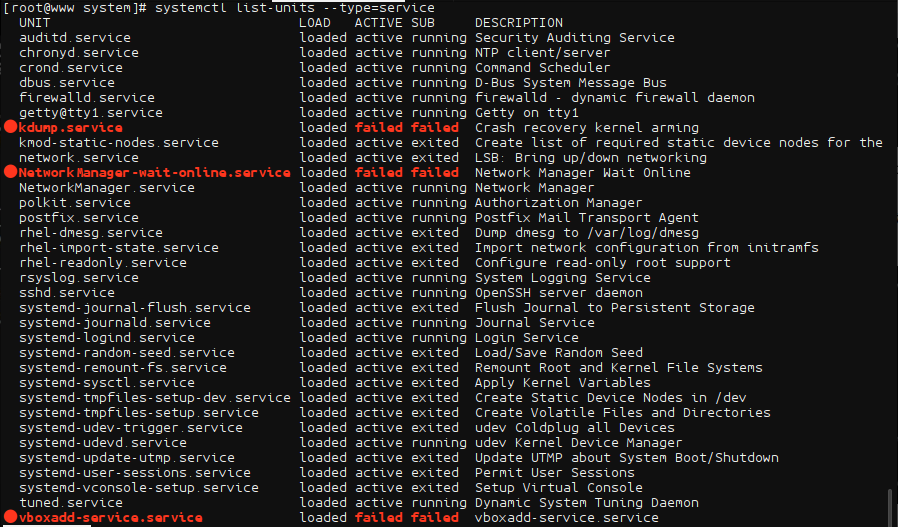
systemctl list-units --all --states=inactive列出所有状态为inactive的unit,如果命令中不加--all,使用systemctl list-units --type=service可以查看状态为active的service: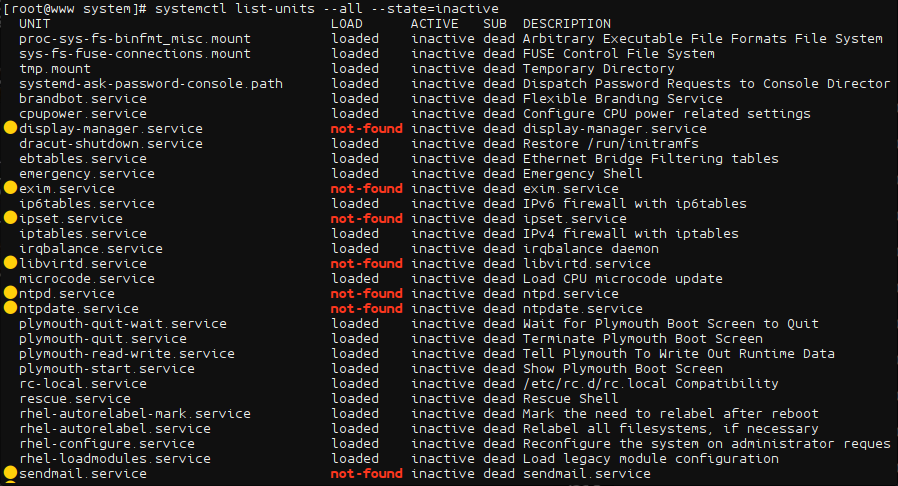
-
systemctl is-active crond.service命令可以查看服务是否是active状态:[root@www system]# systemctl is-active crond.service active
target介绍
-
系统为了方便管理,使用target来管理unit;
-
systemctl list-unit-files --type=target命令可以列出所有的target: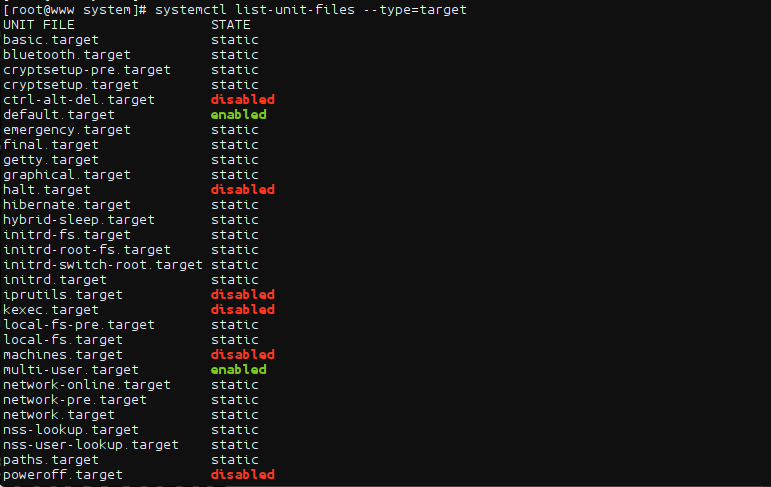
-
命令
systemctl list-dependencies multi-user-target,可以查看指定的target中包括哪些unit: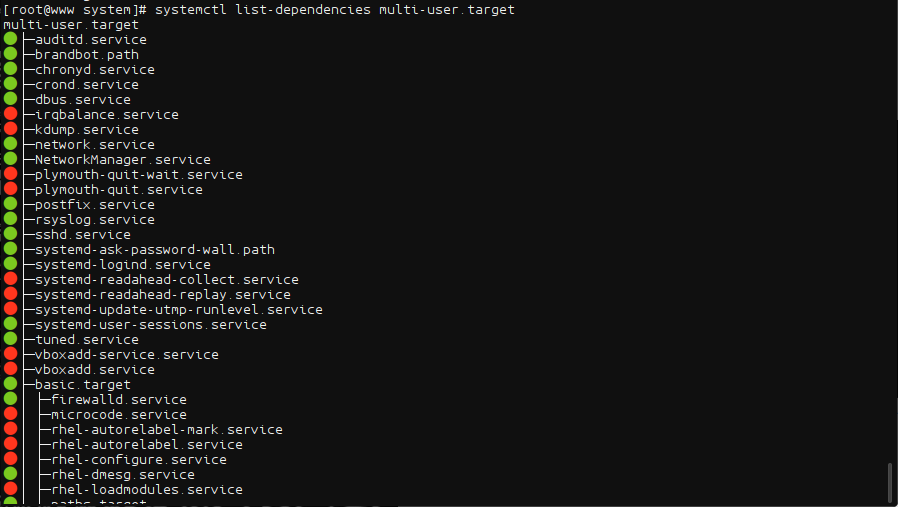
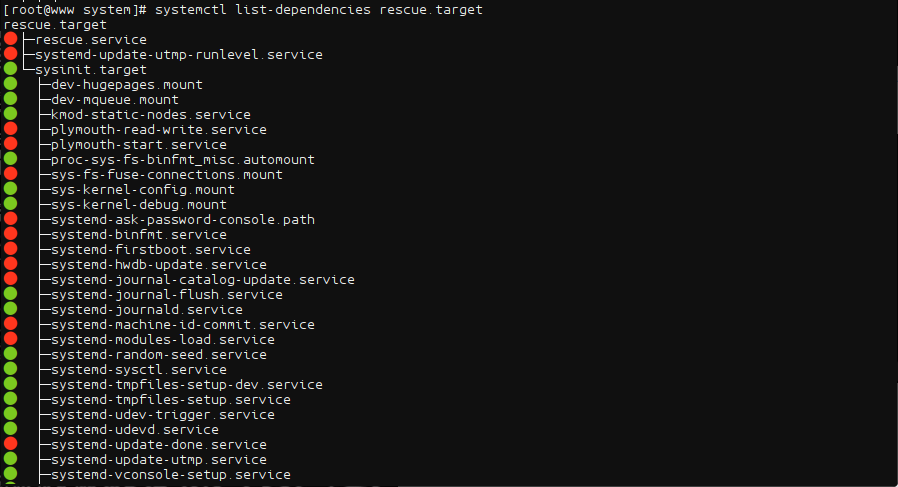
- target中同样也可以包含其他的target,形成嵌套的形式:
-
查看系统默认的target使用命令
systemctl get-default:[root@www system]# systemctl get-default multi-user.target -
Centos6中可以更改系统运行级别,而在Centos7中,更改运行级别是通过更改默认target来实现,使用命令
systemctl set-default multi-user.target更改:[root@www system]# systemctl set-default multi-user.target Removed symlink /etc/systemd/system/default.target. Created symlink from /etc/systemd/system/default.target to /usr/lib/systemd/system/multi-user.target.- 可以看到,设置默认target同样也是使用创建软连接的形式实现。
实际上,systemd中,一个service属于一种类型的unit,而多个unit又组成一个target;所以在target中包含了多个service。
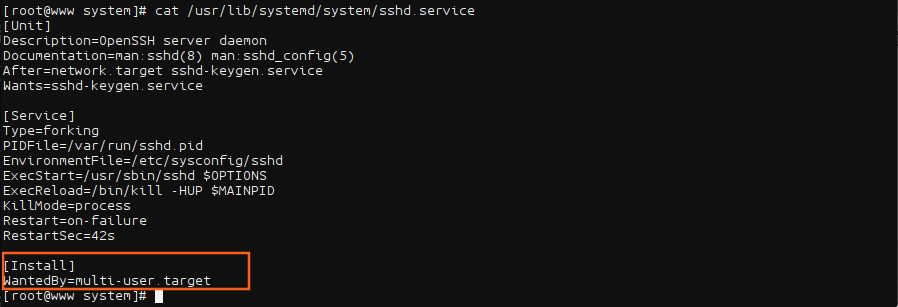
查看service属于哪个target,可以在**/usr/lib/systemd/system/目录下查看service的配置文件的[install]**部分,如sshd服务: