在之前已经编译生成了PHP的模块,本文主要介绍如何配置httpd支持PHP解析,以及Apache的默认虚拟主机的相关知识。
Apache配置PHP解析
修改httpd配置文件
-
httpd的主配置文件为
/usr/local/apache2.4/conf/httpd.conf,增加PHP解析支持,需要修改一下4个地方://去掉ServerName的注释 ServerName www.example.com:80 //将denied修改为granted,防止出现403错误 Require all denied //在下面两行后面增加AddType application/x-httpd-php .php,增加对PHP的支持 AddType application/x-compress .Z AddType application/x-gzip .gz .tgz AddType application/x-httpd-php .php //在index.html后面增加index.php <IfModule dir_module> #DirectoryIndex index.html DirectoryIndex index.html index.php </IfModule> -
修改完成后可以使用
apachectl -t检查配置文件正确性,使用apachectl graceful重新加载配置文件,这样的好处是防止配置错误导致服务宕机:[root@evobot ~]# /usr/local/apache2.4/bin/apachectl -t Syntax OK [root@evobot ~]# /usr/local/apache2.4/bin/apachectl graceful -
默认情况下,服务器的80端口为关闭状态,临时打开80端口,可以使用iptables添加如下规则:
# iptables -I INPUT -p tcp --dport 80 -j ACCEPT
测试PHP支持
-
在apache安装目录下的
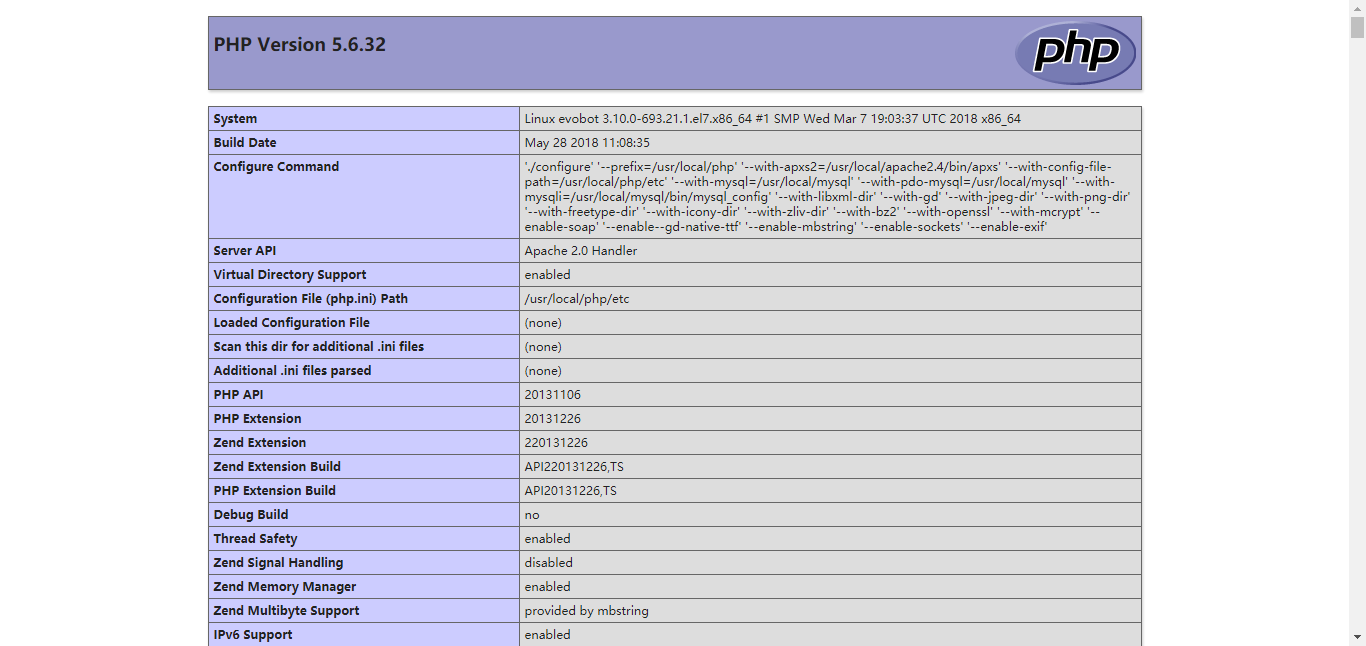
htdocs下创建1.php,写入如下内容:<?php phpinfo(); ?>增加文件后不需要重启服务,访问
ip/1.php查看是否解析成功,看到如下页面则解析成功:
如果不支持解析,则显示的是文件源代码,这时要检查apache的php模块是否加载,模块文件是否存在,配置文件是否加载模块,并且是否增加了
AddType application/x-httpd-php .php这行配置。
Apache默认虚拟主机
-
一台服务器可以运行多个网站,每个网站都是一个虚拟主机,而任何一个域名解析到这台服务器,都可以访问的虚拟主机就是默认的虚拟主机。
-
在httpd.conf中,
DocumentRoot项配置定义了网站的根目录:DocumentRoot "/usr/local/apache2.4/htdocs" <Directory "/usr/local/apache2.4/htdocs"> -
而域名则是
ServerName项的配置,为httpd的默认虚拟主机:ServerName www.example.com:80
虚拟主机配置文件
-
httpd.conf中搜索
extra,找到Virtual hosts配置,去掉注释:# Virtual hosts Include conf/extra/httpd-vhosts.conf -
httpd-vhosts.conf是虚拟主机二级配置文件,打开这条选项后,前面的虚拟主机配置就不再生效,而是虚拟主机配置文件生效,打开httpd-vhosts.conf文件:
<VirtualHost *:80> ServerAdmin webmaster@dummy-host.example.com DocumentRoot "/usr/local/apache2.4/docs/dummy-host.example.com" ServerName dummy-host.example.com ServerAlias www.dummy-host.example.com ErrorLog "logs/dummy-host.example.com-error_log" CustomLog "logs/dummy-host.example.com-access_log" common </VirtualHost> <VirtualHost *:80> ServerAdmin webmaster@dummy-host2.example.com DocumentRoot "/usr/local/apache2.4/docs/dummy-host2.example.com" ServerName dummy-host2.example.com ErrorLog "logs/dummy-host2.example.com-error_log" CustomLog "logs/dummy-host2.example.com-access_log" common </VirtualHost> -
配置文件中的每个
<VirtualHost *:80>都是一个虚拟主机,其中ServerAdmin为网站管理员的邮箱,可以删除;DocumentRoot则是网站根目录的路径;ServerName则是网站的域名;ServerAlias是网站的别名,如果网站有多个域名,可以以空格分割写在这里,而ServerName则只能写一个域名;ErrorLog是网站的错误日志;CustomLog是访问日志,建议将日志重命名便于区分,,如下配置示例:<VirtualHost *:80> DocumentRoot "/data/wwwroot/xtears.cn" ServerName xtears.cn ServerAlias www.abc.com www.123.com ErrorLog "logs/xtears.cn-error_log" CustomLog "logs/xtears.cn-access_log" common </VirtualHost> <VirtualHost *:80> DocumentRoot "/data/wwwroot/xtears.com" ServerName xtears.com ServerAlias 222.com 333.com ErrorLog "logs/xtears.com-error_log" CustomLog "logs/xtears.com-access_log" common </VirtualHost> -
然后为虚拟主机创建网站根目录:
# mkdir -p /data/wwwroot/xtears.cn # mkdir -p /data/wwwroot/xtears.com -
在两个站点目录下创建
index.php文件,分别写入如下内容://xtears.cn <?php echo "xtears.cn"; php?> //xtears.com <?php echo "xtears.com"; php?>
测试虚拟主机配置
-
配置完成后,使用
apachectl -t、apachectl graceful重新生效配置文件; -
curl命令能够以命令行的形式访问网站,-x选项可以查看访问的域名:root@ubuntu:~# curl -x118.24.153.130:80 xtears.cn xtears.cn root@ubuntu:~# -
开启了虚拟主机配置后,默认虚拟主机就变为虚拟主机配置中的第一个虚拟主机,任何域名指向到服务器都会访问第一个虚拟主机。
root@ubuntu:~# curl -x118.24.153.130:80 222.com
xtears.comroot@ubuntu:~# curl -x118.24.153.130:80 333.com
xtears.comroot@ubuntu:~# curl -x118.24.153.130:80 xtears.com
xtears.comroot@ubuntu:~# curl -x118.24.153.130:80 www.abc.com
xtears.cnroot@ubuntu:~# curl -x118.24.153.130:80 www.123.com
xtears.cnroot@ubuntu:~# curl -x118.24.153.130:80 xtears.cn
xtears.cnroot@ubuntu:~#
