- 安装kibana
- 配置kibana
- 安装logstash
- 配置logstash
安装kibana
-
kibana是用来浏览器呈现可视化数据和状态图形的,例如之前使用curl查看的ELK集群信息;
-
在主节点128上执行安装kibana的命令,可以使用yum安装,如果速度太慢,也可以下载rpm安装:
yum install -y kibana # 下载rpm包安装 wget https://artifacts.elastic.co/downloads/kibana/kibana-6.0.0-x86_64.rpm rpm -ivh kibana-6.0.0-x86_64.rpm -
(可省略)kibana同样也需要安装x-pack,安装方法和elasticseatch的x-pack相同:
cd /usr/share/kibana/bin
./kibana-plugin install x-pack
# 如果上面的命令安装比较慢,可以下载x-pack的zip文件安装
wget https://artifacts.elastic.co/downloads/packs/x-pack/x-pack-6.0.0.zip
./kibana-plugin install file:///tmp/x-pack-6.0.0.zip
配置kibana
-
安装完kibana之后,需要对其进行配置,kibana的配置文件是
/etc/kibana/kibana.yml; -
打开配置文件,定义以下几项配置,其中
server.host为kibana监听的IP地址,由于没有安装收费的x-pack对访问进行认证,所以这里和elasticsearch一样,只监听内网IP,对于需要向公网开放的情况,建议使用nginx进行代理访问,并进行安全认证:server.port: 5601 server.host: "192.168.139.128" # elasticsearch主节点地址 elasticsearch.url: "http://192.168.139.128:9200"# 默认kibana的日志在/var/log/message目录下,可以将这里的stdout改为自定义的路径 logging.dest: stdout logging.dest: /var/log/kibana.log# 配置完日志路径后,还需要自行创建日志文件 touch /var/log/kibana.log chmod 777 /var/log/kibana.log -
配置完成后,启动kibana,并查看进程和监听端口5601:
[root@centos_1 ~]# systemctl start kibana [root@centos_1 ~]# ps aux |grep kibana kibana 2505 46.3 6.3 1123216 118016 ? Ssl 23:09 0:02 /usr/share/kibana/bin/../node/bin/node --no-warnings /usr/share/kibana/bin/../src/cli -c /etc/kibana/kibana.yml root 2517 0.0 0.0 112724 984 pts/0 S+ 23:09 0:00 grep --color=auto kibana [root@centos_1 ~]# netstat -tlnp Active Internet connections (only servers) Proto Recv-Q Send-Q Local Address Foreign Address State PID/Program name tcp 0 0 192.168.139.128:5601 0.0.0.0:* LISTEN 2505/node tcp 0 0 0.0.0.0:22 0.0.0.0:* LISTEN 1005/sshd tcp 0 0 127.0.0.1:25 0.0.0.0:* LISTEN 1449/master tcp6 0 0 :::3306 :::* LISTEN 1247/mysqld tcp6 0 0 192.168.139.128:9200 :::* LISTEN 2265/java tcp6 0 0 :::8080 :::* LISTEN 1679/java tcp6 0 0 192.168.139.128:9300 :::* LISTEN 2265/java tcp6 0 0 :::22 :::* LISTEN 1005/sshd tcp6 0 0 ::1:25 :::* LISTEN 1449/master -
正常启动kibana后,就可以到浏览器访问
[kibana ip]:5601,如果安装了x-pack,访问时需要输入用户名elastic,和设置的密码,无法输入用户名和密码的情况,需要查看kibana的日志:
-
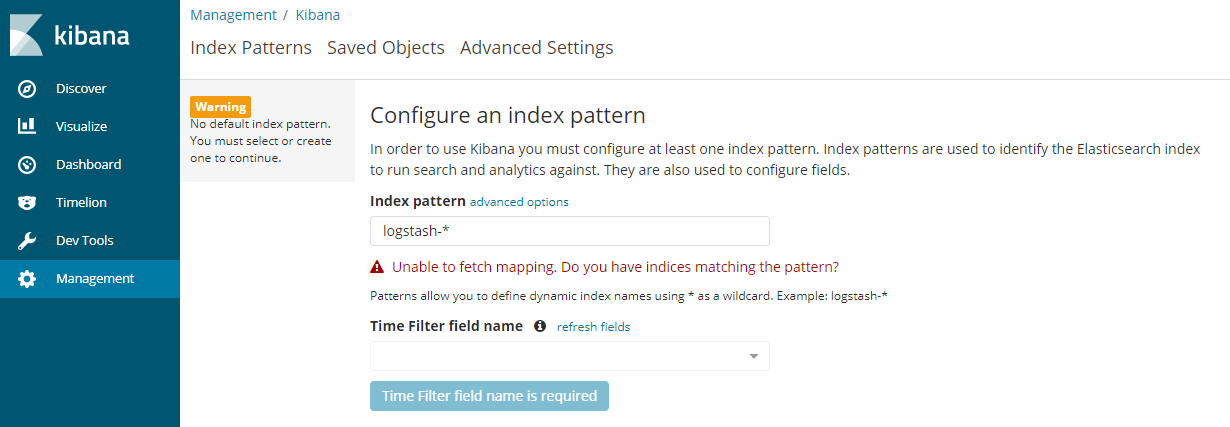
由于还没有配置logstash,所以访问kibana后没有什么可操作的项,如果出现
Status changed from uninitialized to red - Elasticsearch is still initializing the kibana index错误,则执行curl -XDELETE http://192.168.139.128:9200/.kibana -uelastic。
安装logstash
-
安装logstash需要在数据节点上安装,这里在130机器上进行操作;
-
logstash 6.0 目前不支持java9;
-
安装logstash同样可以采用yum安装或者下载rpm包安装:
yum install -y logstash
wget https://artifacts.elastic.co/downloads/logstash/logstash-6.0.0.rpm
rpm -ivh logstash-6.0.0.rpm
# 安装x-pack
cd /usr/share/logstash/bin
./logstash-plugin install file:///tmp/x-pack-6.0.0.zip
配置logstash
-
安装完成后,暂时不要启动logstash服务,先进行配置,收集系统的syslog日志,在logstash的配置文件保存路径
/etc/logstash/conf.d/下,创建syslog.conf配置文件:input { syslog { type => "system-syslog" port => 10514 } } output { stdout { codec => rubydebug } }这里input指定日志源,output指定输出方式,type定义日志源类型,port指定监听的端口,这里也可以直接指定文件,这里配置端口是为了让syslog即/var/message日志记录到指定的端口上,而output中的
codec => rubydebug则是让logstash将信息输出到屏幕打印。 -
保存配置后 ,可以对配置文件进行检查,确认是否配置正确,elasticsearch,kibana,logstash的命令可执行文件,都在
/usr/share/下的同名目录内:[root@centos2 ~]# cd /usr/share/logstash/ [root@centos2 logstash]# cd bin/ [root@centos2 bin]# ./logstash --path.settings /etc/logstash/ -f /etc/logstash/conf.d/syslog.conf --config.test_and_exit Sending Logstash's logs to /var/log/logstash which is now configured via log4j2.properties Configuration OK该命令中
--path.settings指定logstash的主配置文件所在目录,-f指定我们配置的监听日志的配置文件路径,--config.test_and_exit是对配置文件进行检测并退出,不加这个选项,logstash则会直接启动该配置日志监听。 -
由于上面的syslog配置文件中指定了监听端口,所以还需要对syslog进行配置,编辑
/etc/rsyslog.conf文件,找到#### RULES ####这一行,在该行下面添加配置如下,将日志输出给本机的logstash:*.* @@192.168.139.132:10514 -
执行
systemctl restart rsyslog重启syslog服务; -
启动logstash
./logstash --path.settings /etc/logstash/ -f /etc/logstash/conf.d/syslog.conf启动后,会直接进入屏幕打印,并且暂时没有日志输出,所以需要在系统上执行一些操作,让syslog产生日志:
[root@centos2 bin]# ./logstash --path.settings /etc/logstash/ -f /etc/logstash/conf.d/syslog.conf
Sending Logstash's logs to /var/log/logstash which is now configured via log4j2.properties
{
          "severity" => 6,
           "program" => "rsyslogd",
           "message" => "[origin software=\"rsyslogd\" swVersion=\"8.24.0\" x-pid=\"2155\" x-info=\"http://www.rsyslog.com\"] exiting on signal 15.\n",
              "type" => "system-syslog",
          "priority" => 46,
         "logsource" => "centos2",
        "@timestamp" => 2020-04-21T13:46:40.000Z,
          "@version" => "1",
              "host" => "192.168.139.132",
          "facility" => 5,
    "severity_label" => "Informational",
         "timestamp" => "Apr 21 21:46:40",
    "facility_label" => "syslogd"
}
{
          "severity" => 6,
           "program" => "systemd",
           "message" => "Stopping System Logging Service...\n",
              "type" => "system-syslog",
          "priority" => 30,
         "logsource" => "centos2",
        "@timestamp" => 2020-04-21T13:46:40.000Z,
          "@version" => "1",
              "host" => "192.168.139.132",
          "facility" => 3,
    "severity_label" => "Informational",
         "timestamp" => "Apr 21 21:46:40",
    "facility_label" => "system"
}
{
          "severity" => 6,
           "program" => "systemd",
           "message" => "Starting System Logging Service...\n",
              "type" => "system-syslog",
          "priority" => 30,
         "logsource" => "centos2",
        "@timestamp" => 2020-04-21T13:46:40.000Z,
          "@version" => "1",
              "host" => "192.168.139.132",
          "facility" => 3,
    "severity_label" => "Informational",
         "timestamp" => "Apr 21 21:46:40",
    "facility_label" => "system"
}
{
          "severity" => 6,
           "program" => "rsyslogd",
           "message" => "[origin software=\"rsyslogd\" swVersion=\"8.24.0\" x-pid=\"2307\" x-info=\"http://www.rsyslog.com\"] start\n",
              "type" => "system-syslog",
          "priority" => 46,
         "logsource" => "centos2",
        "@timestamp" => 2020-04-21T13:46:41.000Z,
          "@version" => "1",
              "host" => "192.168.139.132",
          "facility" => 5,
    "severity_label" => "Informational",
         "timestamp" => "Apr 21 21:46:41",
    "facility_label" => "syslogd"
}
{
          "severity" => 5,
               "pid" => "637",
           "program" => "polkitd",
           "message" => "Unregistered Authentication Agent for unix-process:2300:745766 (system bus name :1.46, object path /org/freedesktop/PolicyKit1/AuthenticationAgent, locale zh_CN.UTF-8) (disconnected from bus)\n",
              "type" => "system-syslog",
          "priority" => 85,
         "logsource" => "centos2",
        "@timestamp" => 2020-04-21T13:46:41.000Z,
          "@version" => "1",
              "host" => "192.168.139.132",
          "facility" => 10,
    "severity_label" => "Notice",
         "timestamp" => "Apr 21 21:46:41",
    "facility_label" => "security/authorization"
}
{
          "severity" => 6,
           "program" => "systemd",
           "message" => "Started System Logging Service.\n",
              "type" => "system-syslog",
          "priority" => 30,
         "logsource" => "centos2",
        "@timestamp" => 2020-04-21T13:46:41.000Z,
          "@version" => "1",
              "host" => "192.168.139.132",
          "facility" => 3,
    "severity_label" => "Informational",
         "timestamp" => "Apr 21 21:46:41",
    "facility_label" => "system"
}
